Disable SSH password authorization
Warning
Do not disable password authorization before adding SSH keys. We told you how to add them in the last article - click
Ways to disable password login
Using nano (text editor)
Let's enter the command to go to SSHd settings:
nano /etc/ssh/sshd_config

Move the caret to the line #PasswordAuthentication yes.

We remove the lattice character (#), making the string active. And change the value of "yes" to "no".

Save the changes by pressing CTRL+X and typing "Y" to confirm.

Restart the SSH service
sudo service ssh restart
Using sFTP
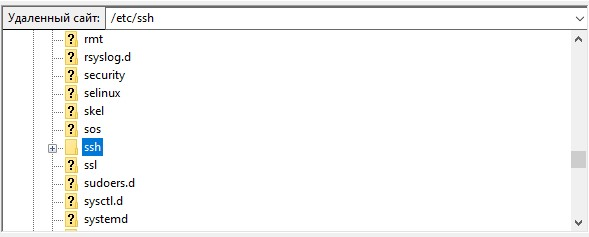
Connect to the server and specify the path /etc/ssh in the address term.
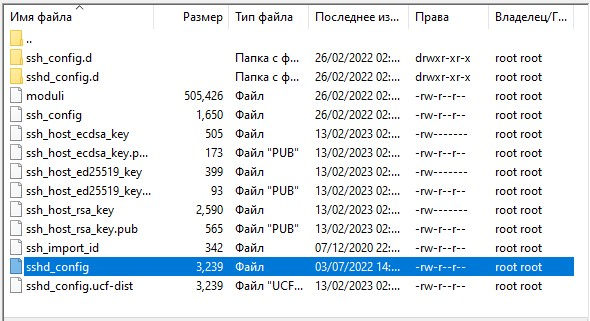
Let's open the sshd_config file.
Find the line #PasswordAuthentication yes.

Remove the grid character (#) and make the string active by changing the value of yes to no.

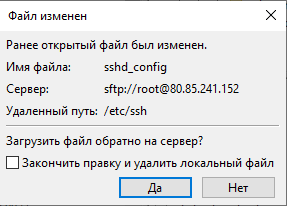
Save and confirm sending the changes to the server.
Restart the SSH service
sudo service ssh restart
Configure sFTP authorization via SSH key
After disabling access to the server via password, it will be important for you to enable sFTP authorization via SSH key. This will take no more than a minute.
FileZilla
Let's open the "Editing" and "Settings" section.
Go to the "FTP" subsection, then "sFTP" and add the private key file.
Now FileZilla will use this key when connecting to the server.
WinSCP
Create a new connection. In the window that opens, specify the IP address of the server and the username.
Click the "Add more..." button below the password line.
Select the "Authentication" section and add a private key.
Save the changes with the "OK" button.
Let's try to connect to our server.
Enter the secret key code (Passphrase), in our case "aeza".
Congratulations! You have connected to the server via sFTP!