WireGuard - creating a private VPN
First, prepare a server with the Wireguard package installed. This can be done in three different ways. You can choose the one that suits you best.
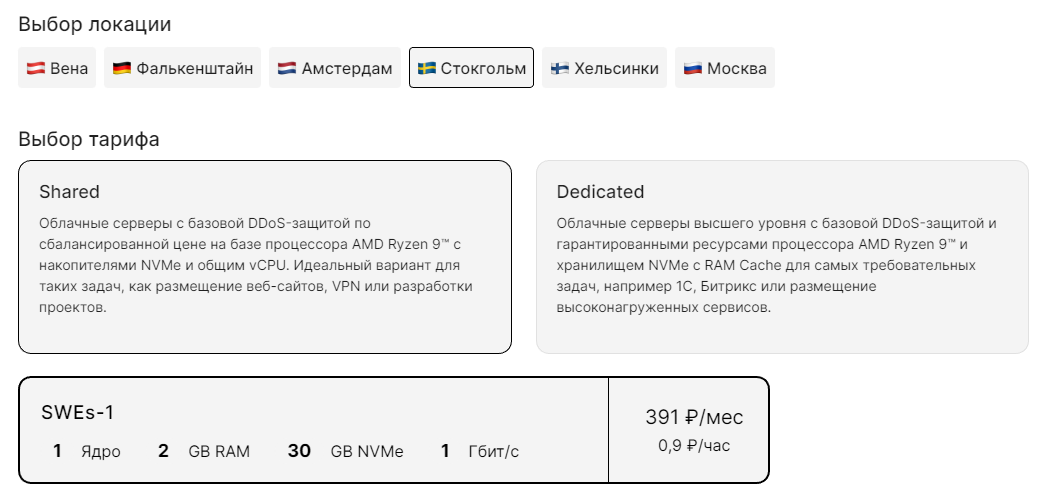
Buy the required plan with WG pre-installed
To do this we need to buy the necessary server in the desired location. In our case it will be the basic tariff DEs-1 in Germany:
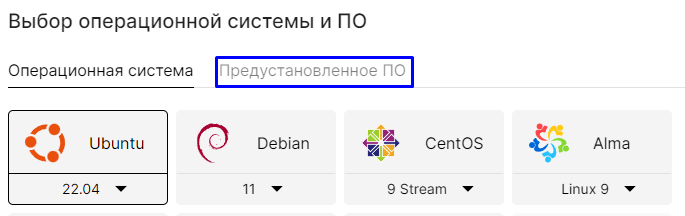
Go to the "Pre-installed software" section:
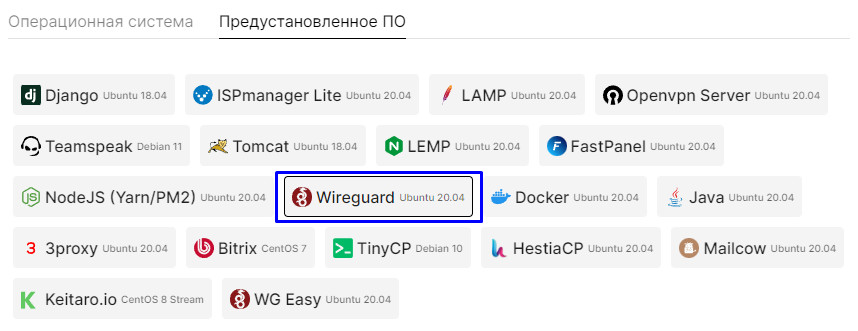
Specify the Wireguard package we need:
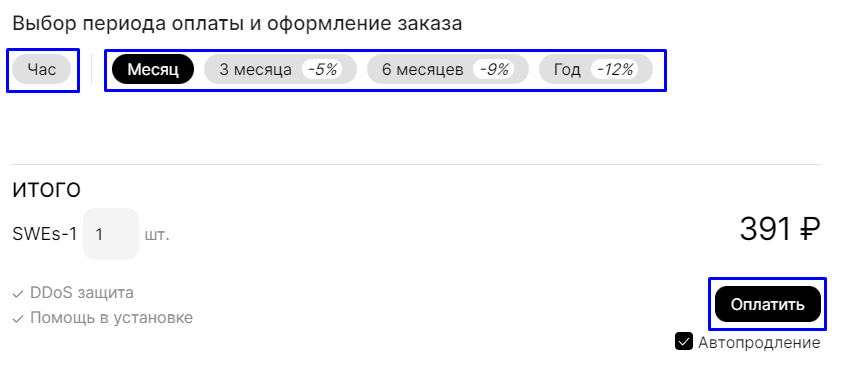
Set the desired rental period by hour or month and click pay:
Information
Great. Now your server is ready to create a config for the VPN connection. We will tell you how to create it in "Creating a connection config ".
Installing Wireguard on an already installed Ubuntu OS
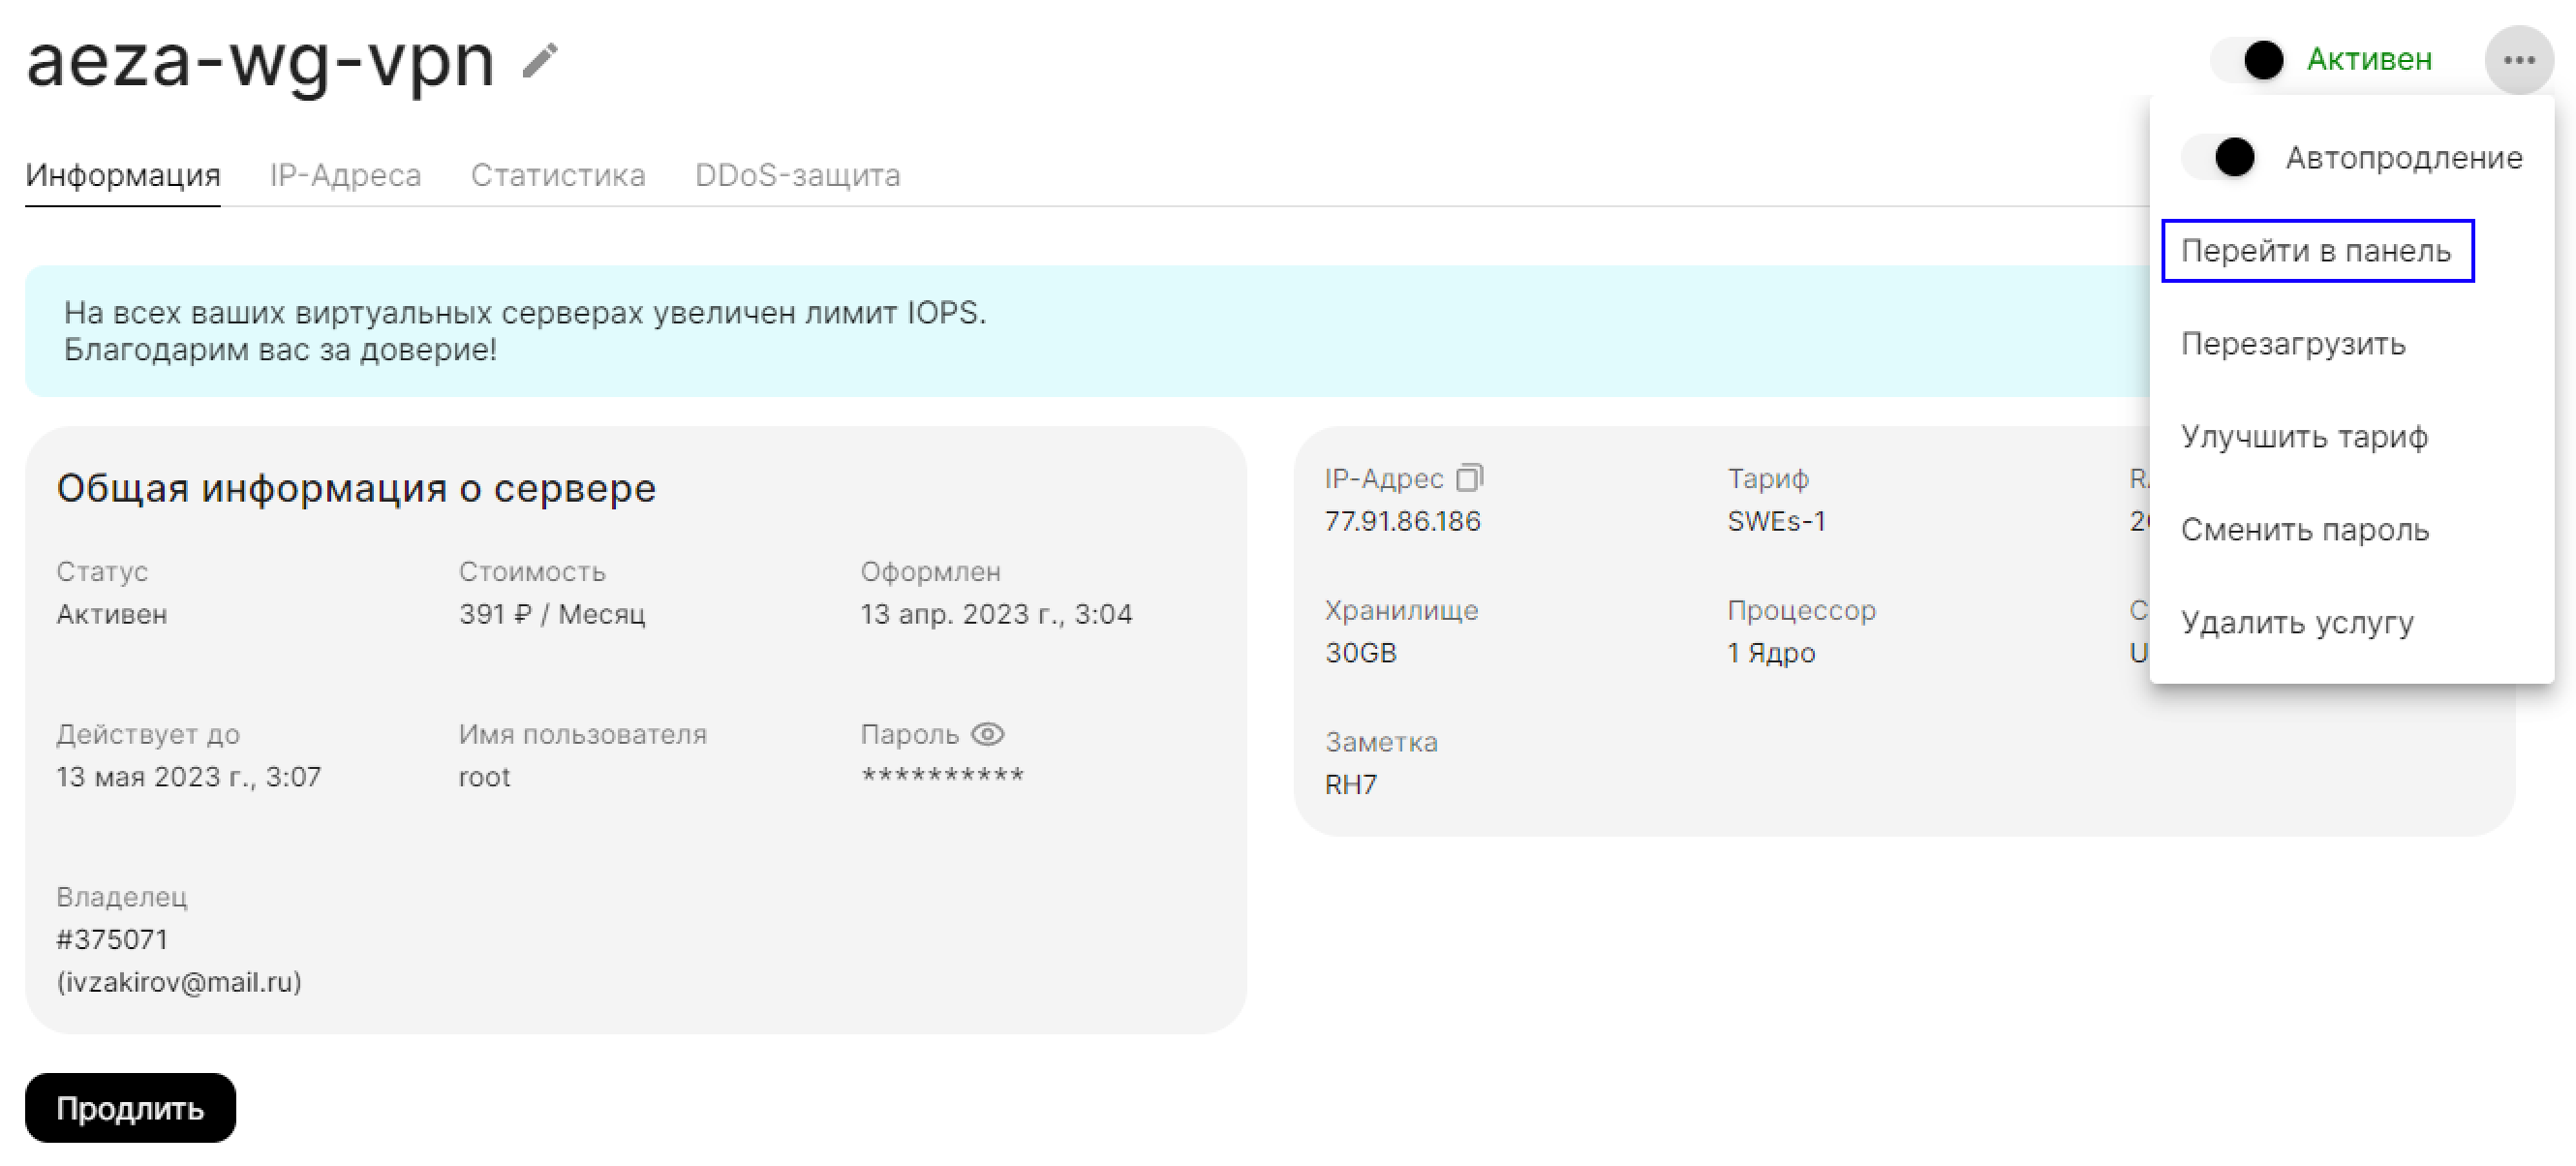
Go to the services section and click the arrow icon to the right of the already purchased server:

Let's click the three dots in the upper right corner of the service and go to the control panel:
Open the right menu of the required server and go to run the software installation script:

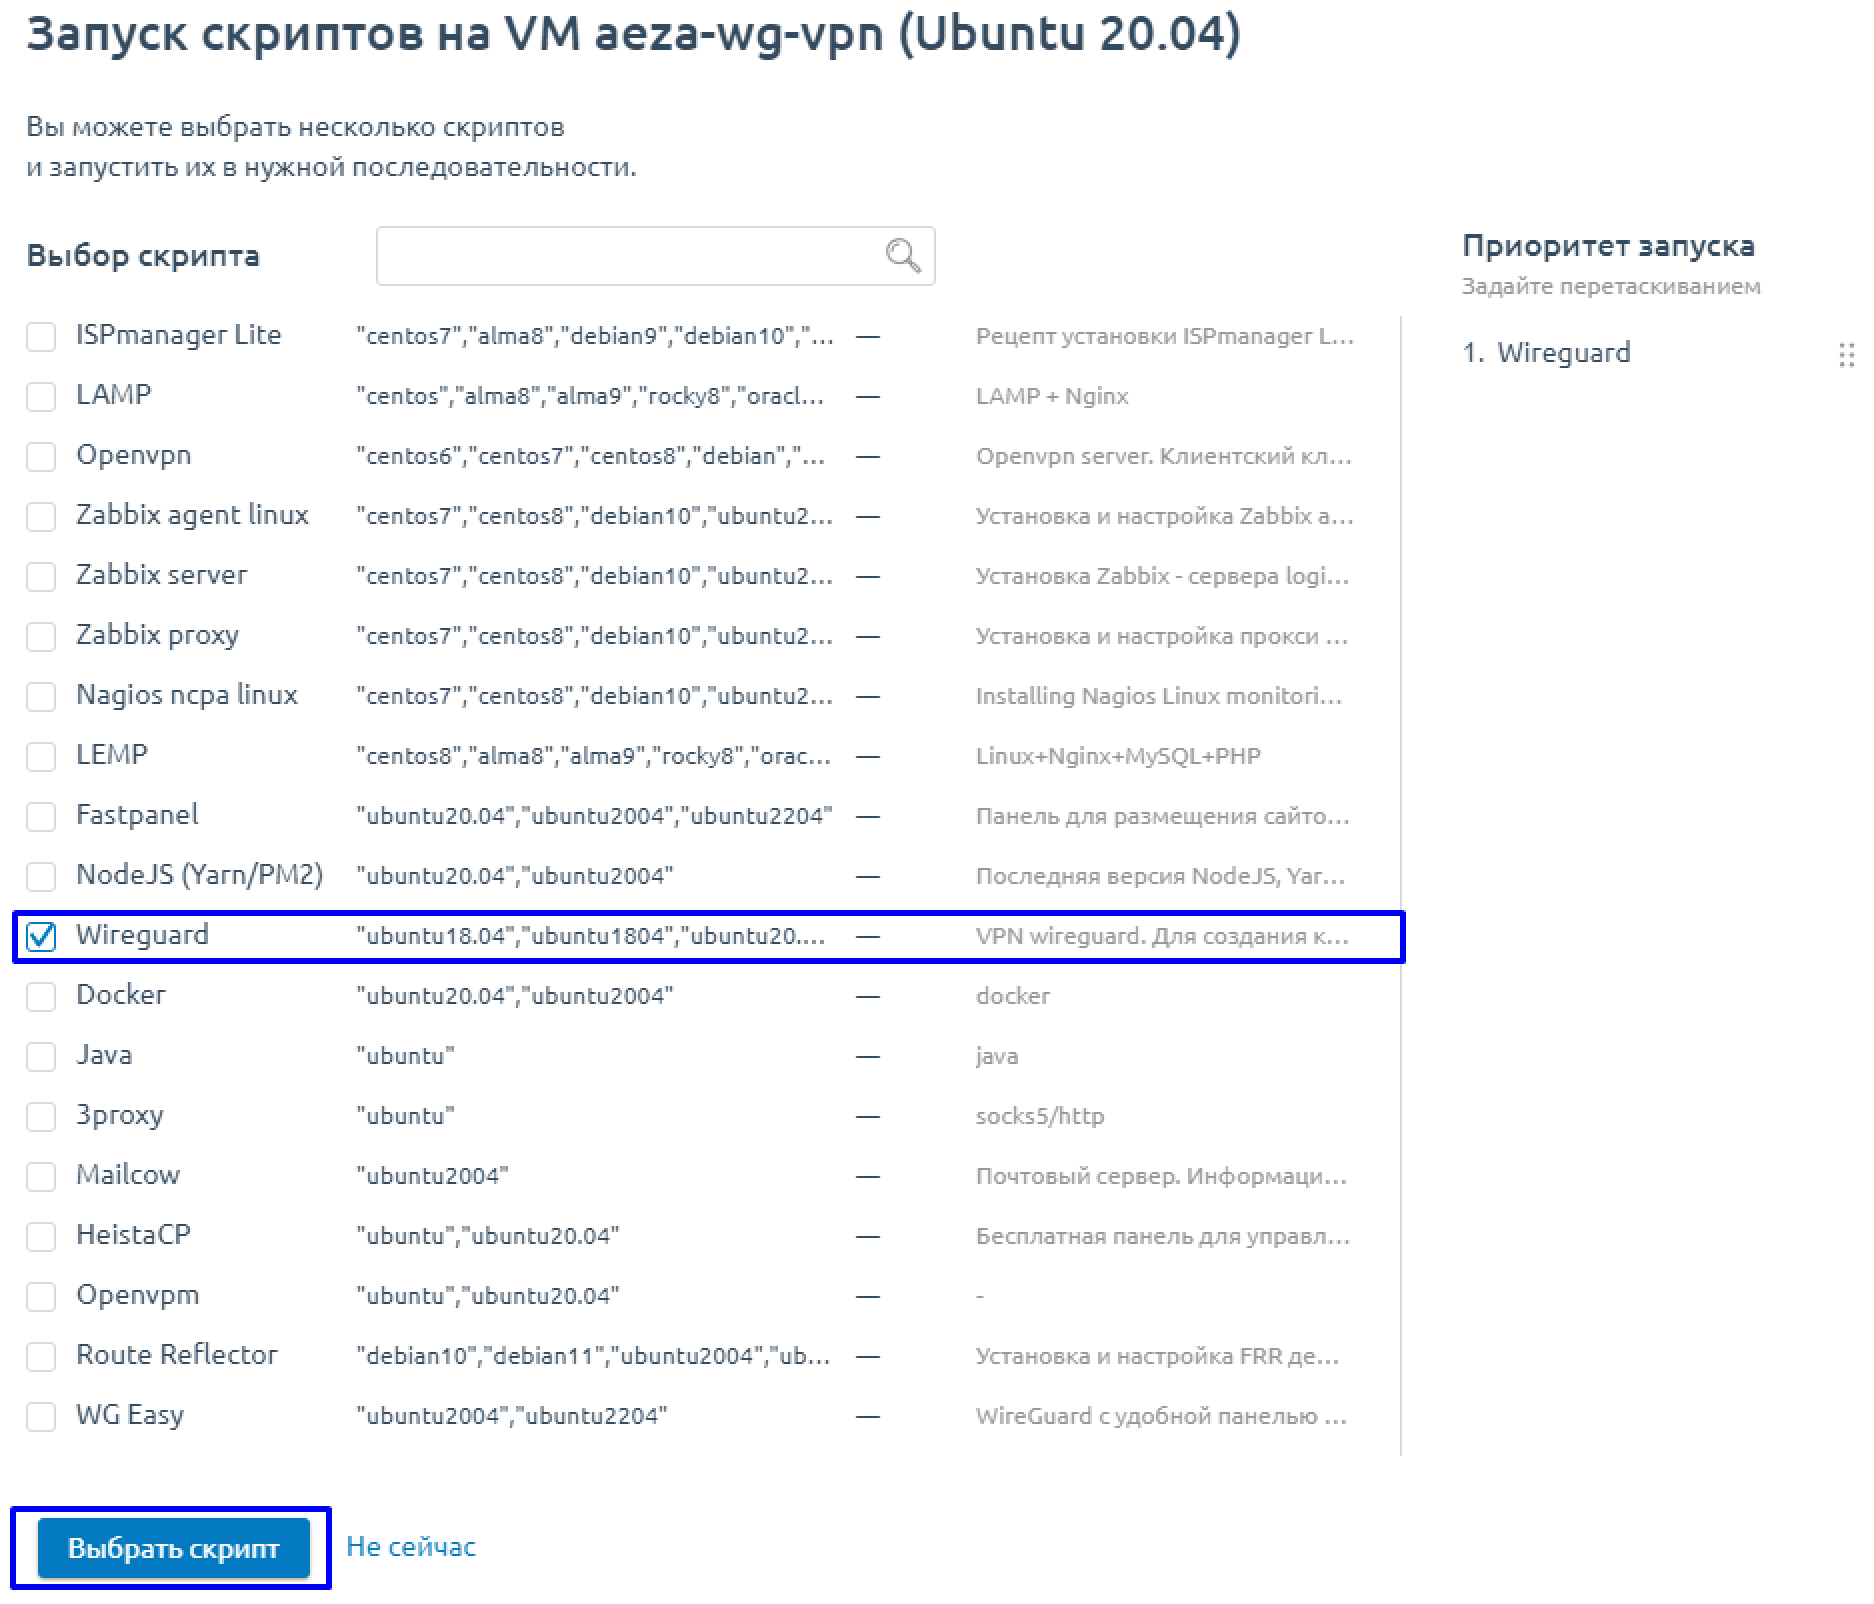
Select the Wireguard installation script and run it:

Information
Great. Now your server is ready to create a config for the VPN connection. We'll cover its creation in step 2 ("Creating the connection config").
Reinstalling the ready server on Ubuntu OS with Wirdguard pre-installed
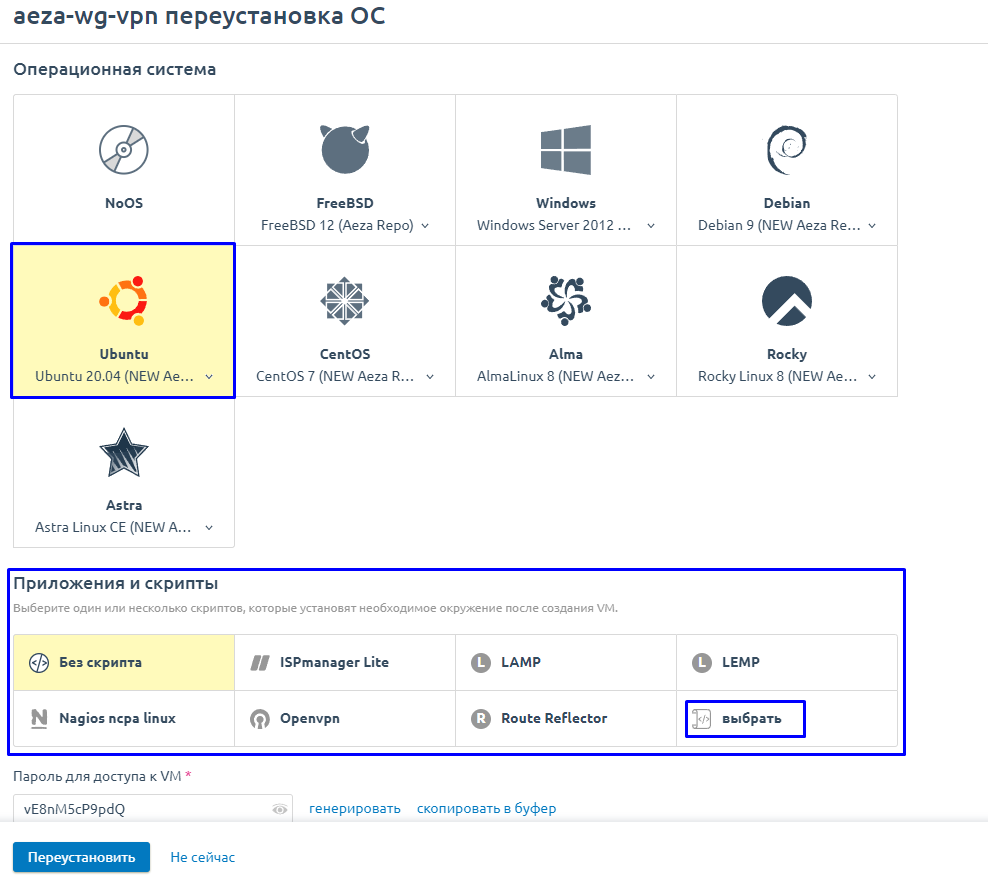
In case you have an off-the-shelf server, you can also reinstall its operating system with Wireguard pre-installed. To do this, go to the control panel following the instructions of the previous point and select reinstall server OS.

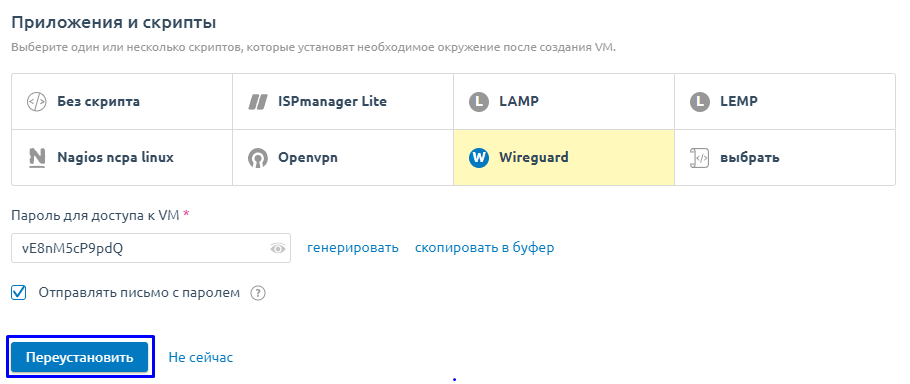
Select Ubuntu OS and click the select button in the "Applications and Scripts " panel:
Select the Wireguard installation script and confirm with the "Select Script " button:
Click the "Reinstall " button:
Connect and create a configuration file
Connect to the server via WinSCP and login and password from the customer area, or a letter from your mail (in case of OS reinstallation).
Launch the server console through the previously installed PuTTY and authorize in it:
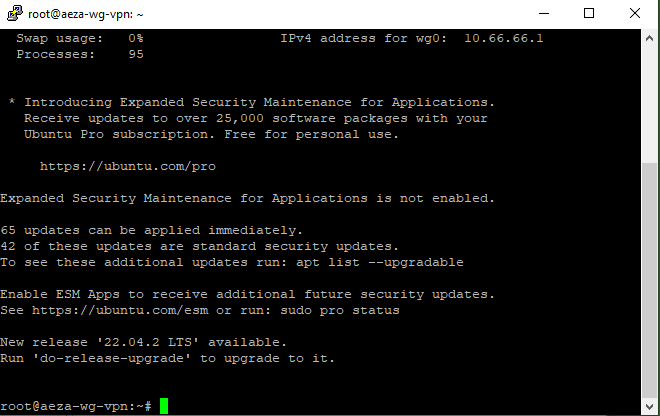
Write the command in the console:
-CODE- /root/wg_n.sh -CODE-
Get the ready config for connection via Wireguard for phone program and save the QR code, or scan it immediately with smartphone camera:

Getting the config for Wireguard on the PC
To do this, go back to the WinSCP program and update the contents of the folder
Click on the client.conf file and the F5 button or PCM + the "Get " button.
Specify location to save the Wireguard config file on our PC
Once it is downloaded you can open it and view the contents, it will look like this and you can send this text to friends or keep it for personal use
Download, install and run Wireguard for your operating system and click on the "Add Tunnel " arrow button to create an empty tunnel.
Paste the text of our config that we downloaded earlier. Save the tunnel
Click "Connect ", from this moment your IP address will change to the IP address of your server. You will also be able to open sites that are available to citizens of the country where your server is located. **Have fun!